The new Sign In with Apple functionality is a requirement for your iOS apps if you already use any other social login option, and since integration with Firebase is a bit more tricky let’s take all steps together!
In this Quick Win we well configure everything inside the iOS Developer portal and inside Firebase to create an app the allows Sign In with Apple.
We will then also use that login information to authenticate against Firebase and create a new user document based on the information we get back from Apple!
The full quick win with snippets is only available to Ionic Academy members.
Join now for
- Unlimited access to all quick wins
- Library of 40+ step-by-step video courses
- Support for Ionic questions via Slack & private community
Apple App Configuration
Before we do any coding, we need to configure a few things. First of all, you need an Apple App ID – either create a new one like in the image below or use your already existing ID.
If you need a new one, simply click the plus button to create a new identifier inside your Apple developer account.
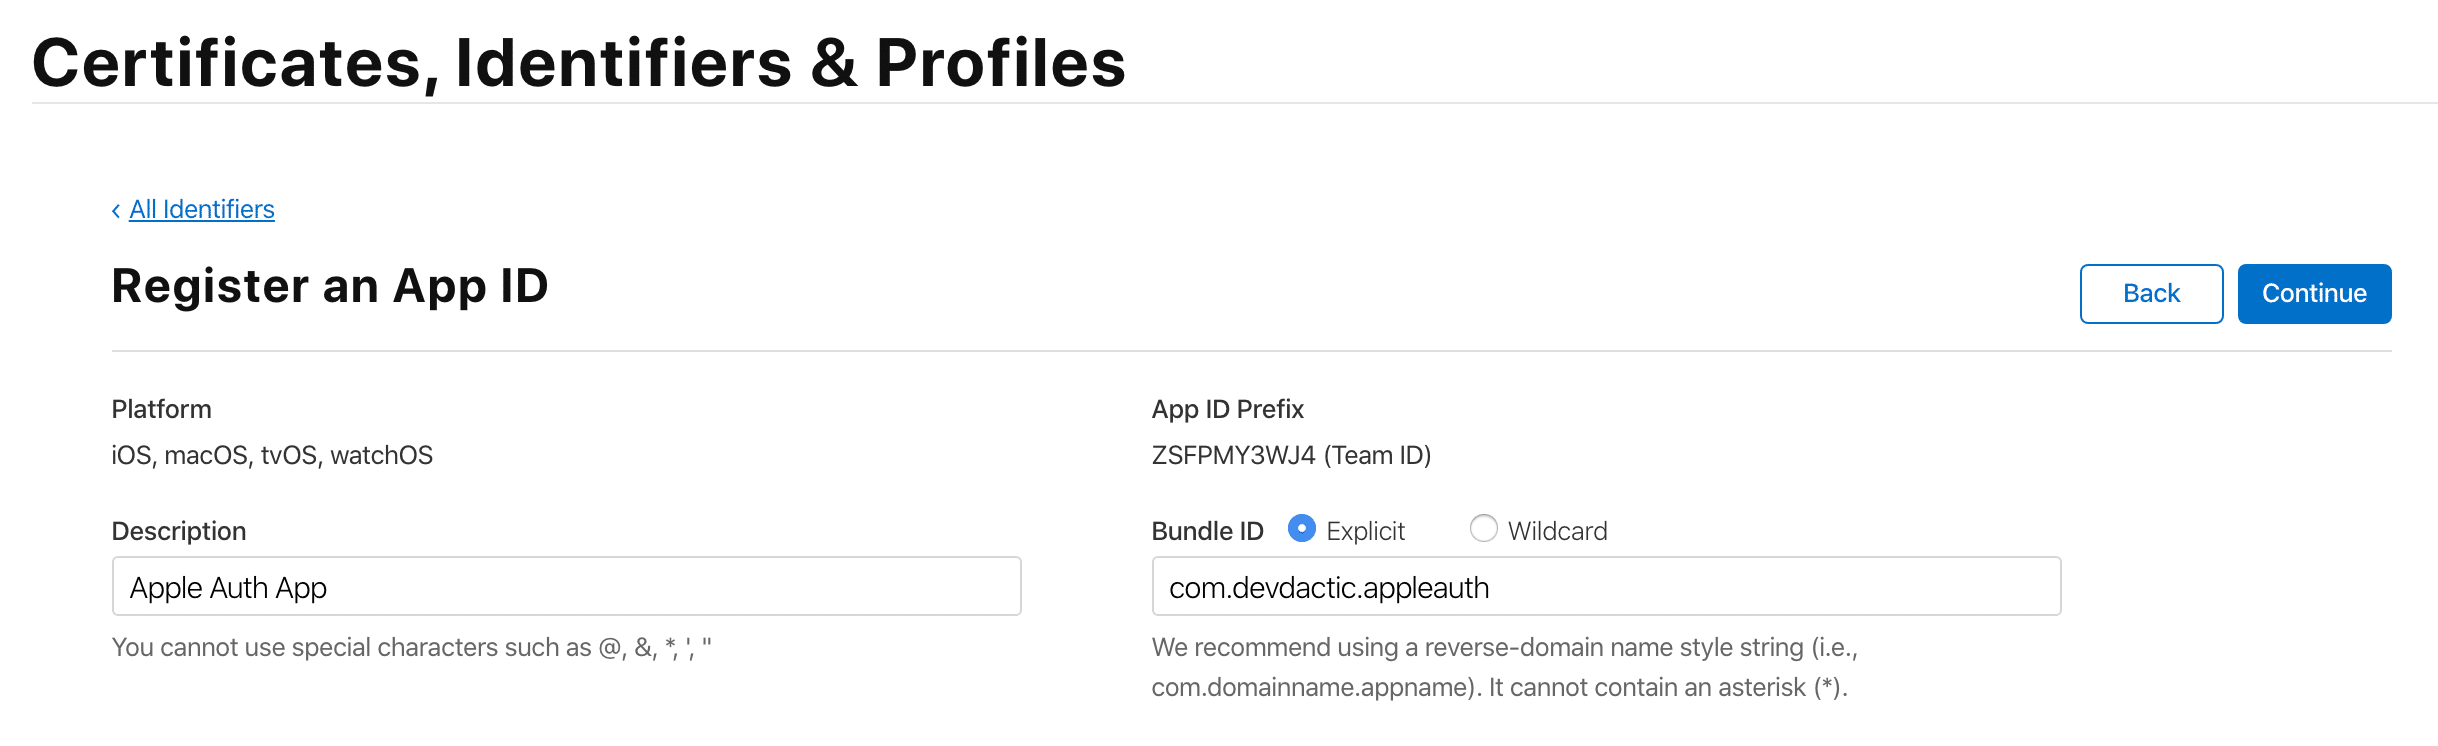
Besides the regular information, it’s important that you enable Sign In with Apple further down the page in the list of capabilities.
You will later need the bundle ID you specified in here, so leave the tab open or remember it.
Setting up Your Ionic App
Now we can create our Ionic app with Capacitor enabled directly. We also install the Sign in with Apple community plugin for Capacitor:
|
1 2 3 4 5 |
ionic start academyApple blank --type=angular --capacitor cd ./academyApple npm i https://github.com/rlfrahm/capacitor-apple-login ionic g service services/auth |
We also created a new service which will handle our authentication process!
If you haven’t done during initialisation you also need to make sure Capacitor uses the right Bundle ID for your app, so open the capacitor.config.json and insert the name of the App ID that you created in our first step:
|
1 2 3 4 5 6 7 8 |
{ "appId": "com.devdactic.appleauth", "appName": "academyApple", "bundledWebRuntime": false, "npmClient": "npm", "webDir": "www", "cordova": {} } |
To add the iOS project and build the native app through Capacitor you can now simply run:
|
1 2 3 4 5 |
ionic build npx cap add ios # Whenever you make changes ionic build && npx cap copy |
Your Capacitor app is ready now, and you could also bring up some nice live reloading while developing your functionality by running:
|
1 |
ionic capacitor run ios --livereload --external |
Firebase Project Configuration
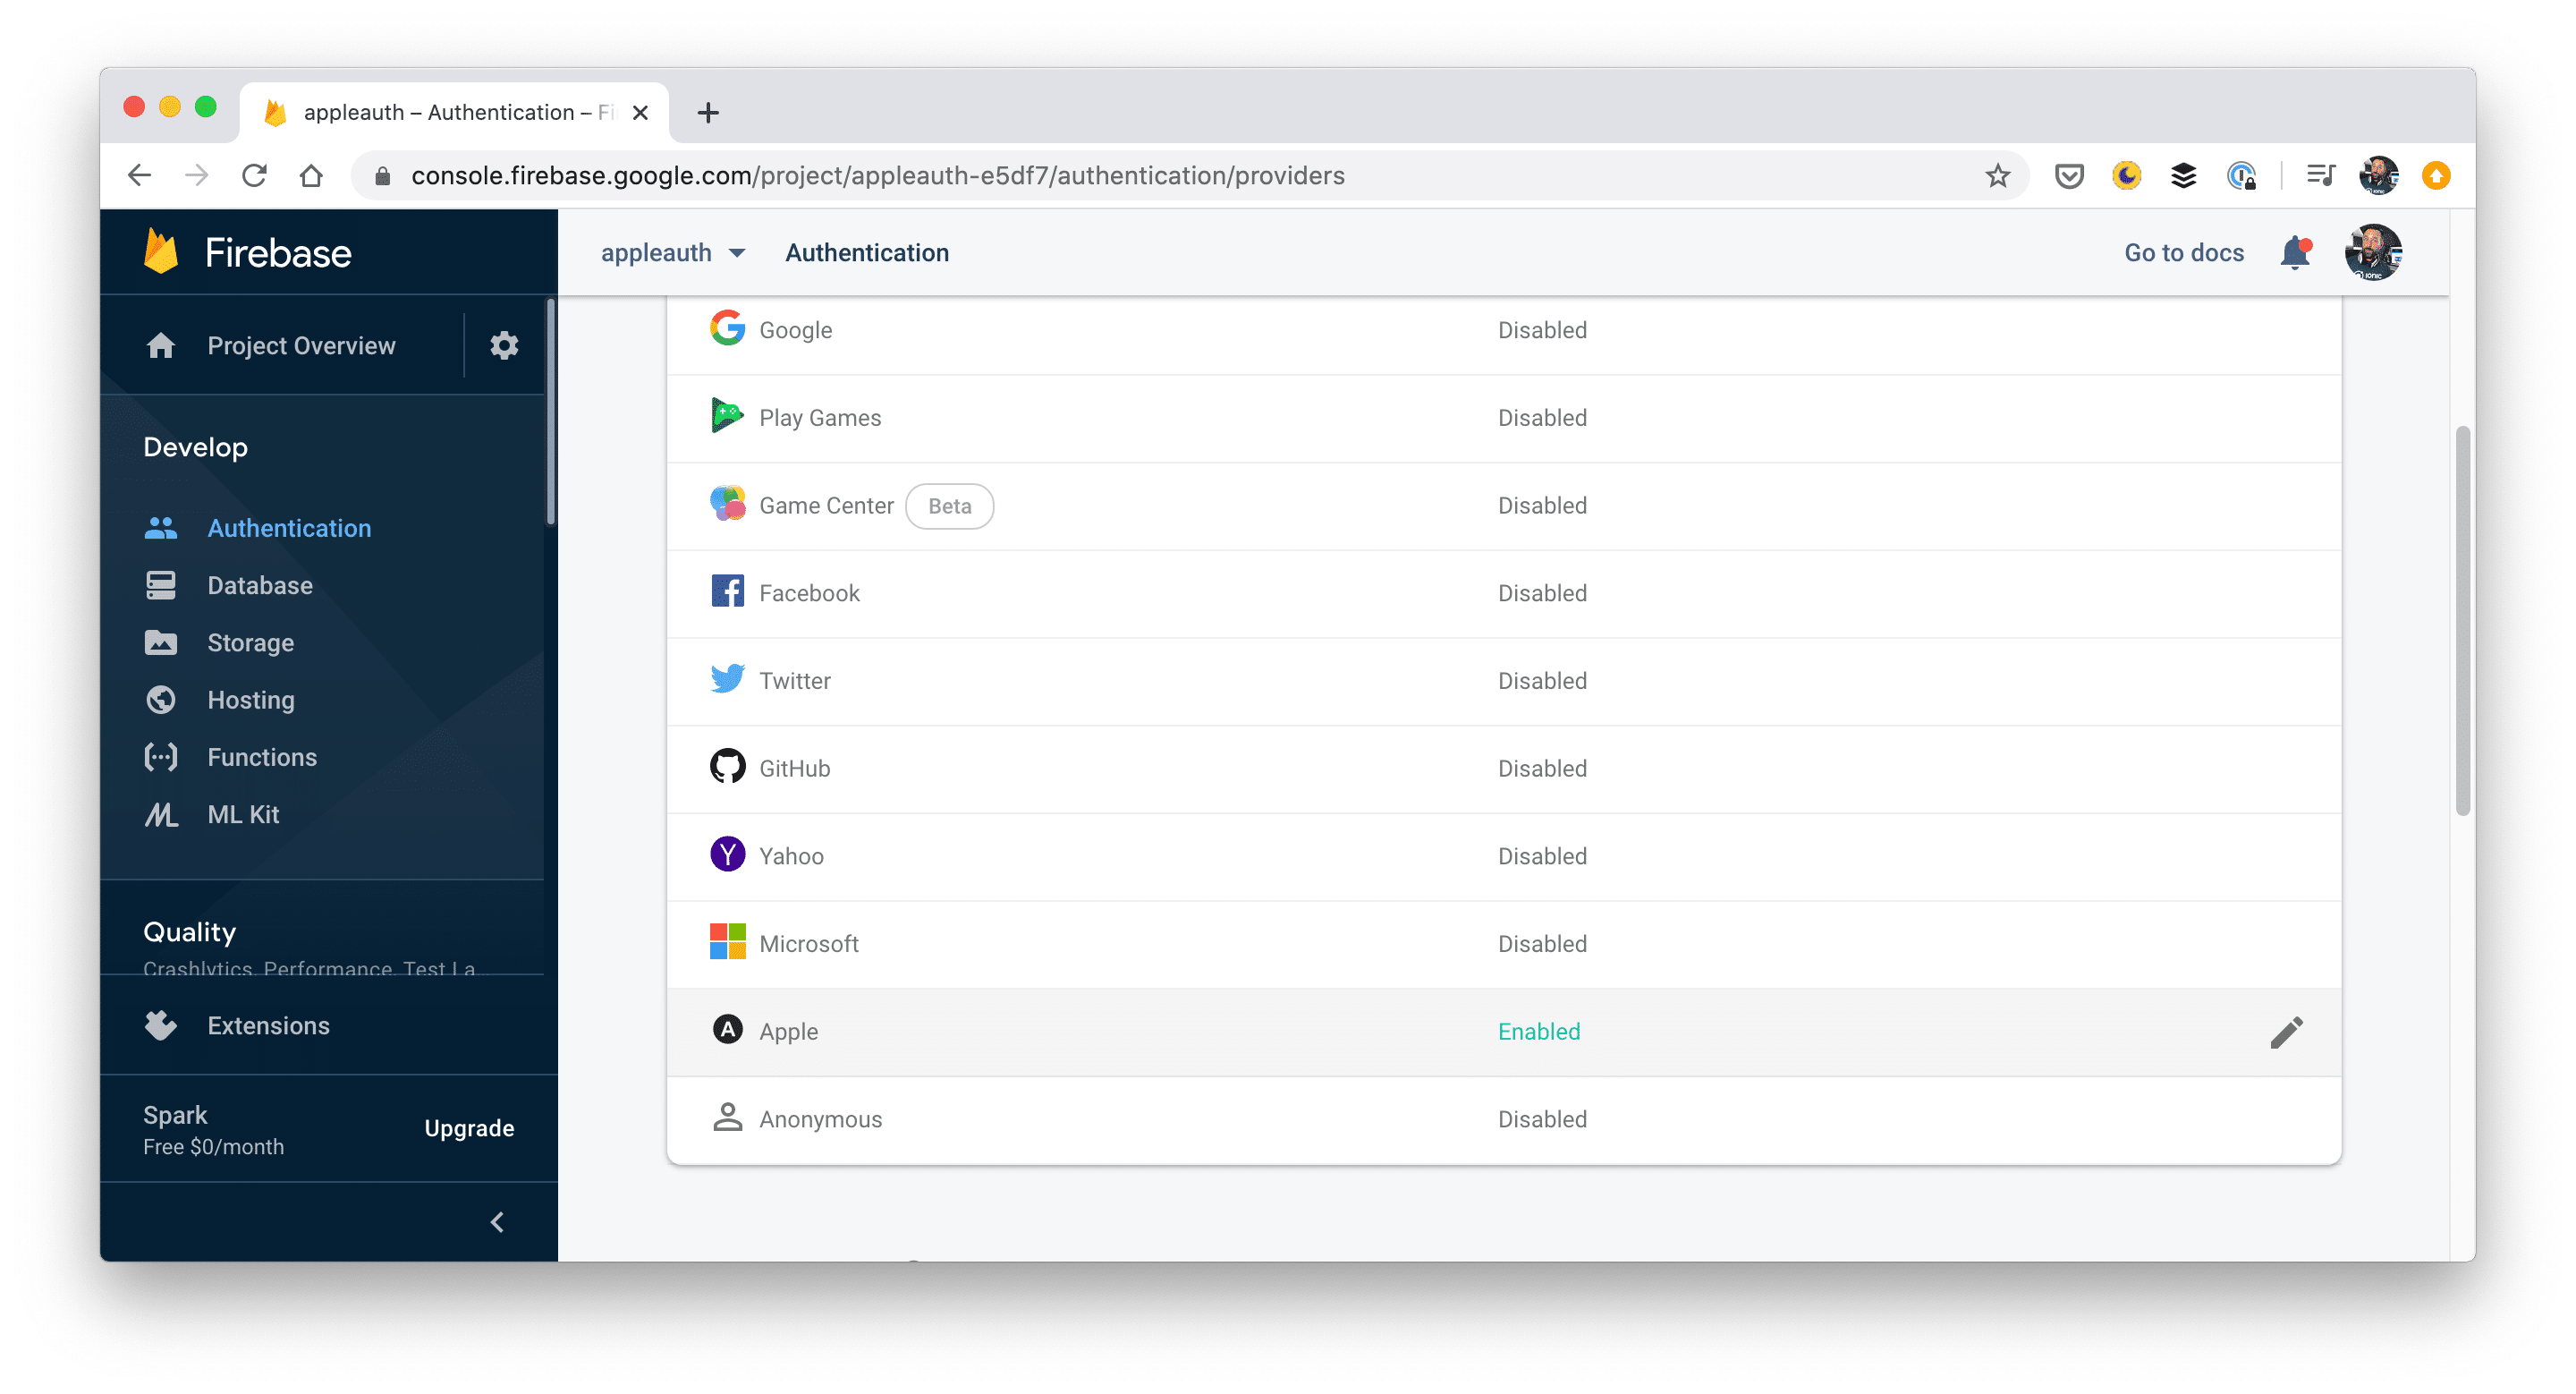
Since we want to automatically create a Firebase user when a new user makes use of our Apple Sign In, we also need a project inside the Firebase console (if you already have one, that’s of course fine too).
Once you are inside your project, we need to enable Apple as a Sign-in method, so go to Authentication -> Sign-in method and toggle the switch to activate it (you don’t need to fill out the other information, just enabling is enough).
We also need to activate the Firestore database, so visit the Database page once and click “Get started”. It will bring up a dialog for initial Firebase rules, and for now you can select “Start in test mode” which puts no specific rules on your database. Make sure to change these rules if you later build out your app!
Finally we also need to get the Firebase configuration for our Ionic app, so visit the Project settings (gear icon at the top left) and from the general tab create both a web app and iOS app.
In the settings for the iOS app use the bundle ID you created within your Apple account before! Initially I didn’t add the iOS platform, which resulted in a domain error while testing the Apple Sign In later.
For the web app, you can simply pick a name and don’t need anything else, but we’ll need the Firebase configuration object that you get for the next step in our Ionic app.
FYI: If you are a regular user of Firebase, you can give the Kickoff Ionic generator a try – it helps you to easily bootstrap an Ionic app with Firebase connection, pages with entities and CRUD functionality right out of the box!
Firebase Integration
Since version 6 of AngularFire we can use an Angular schematic to add it to our project, so go ahead and run this inside your project:
|
1 2 3 |
ng add @angular/fire@next # Perhaps needed npm i firebase |
I also had to install Firebase because for some reason the add schematic didn’t add it. Simply check your package.json if it already contains the standard firebase package. If not, go ahead and install it.
During the installation it will ask to select a Firebase project, so select the one we created before.
This new version will also only work with Angular 9, so if your app is still on an older version you should now update it by running:
|
1 |
ng update @angular/cli @angular/core |
Now we can also add the Firebase config we obtained after adding the web app to our Firebase project. You can paste the value like this into your environments/environment.ts:
|
1 2 3 4 5 6 7 8 9 10 11 12 |
export const environment = { production: false, firebaseConfig: { apiKey: "", authDomain: "", databaseURL: "", projectId: "", storageBucket: "", messagingSenderId: "", appId: "" } }; |
Of course use your values and not empty strings!
The last step of the setup is to initialise AngularFire with this configuration and load all the modules that our app needs, which are the Firestore and the Authentication from AngularFire.
Go ahead and update your app/app.module.ts to:
|
1 2 3 4 5 6 7 8 9 10 11 12 13 14 15 16 17 18 19 20 21 22 23 24 25 26 27 28 29 30 31 32 33 34 35 |
import { NgModule } from '@angular/core'; import { BrowserModule } from '@angular/platform-browser'; import { RouteReuseStrategy } from '@angular/router'; import { IonicModule, IonicRouteStrategy } from '@ionic/angular'; import { SplashScreen } from '@ionic-native/splash-screen/ngx'; import { StatusBar } from '@ionic-native/status-bar/ngx'; import { AppComponent } from './app.component'; import { AppRoutingModule } from './app-routing.module'; import { AngularFireModule } from '@angular/fire'; import { AngularFireAuthModule } from '@angular/fire/auth'; import { AngularFirestoreModule } from '@angular/fire/firestore'; import { environment } from '../environments/environment'; @NgModule({ declarations: [AppComponent], entryComponents: [], imports: [ BrowserModule, IonicModule.forRoot(), AppRoutingModule, AngularFireModule.initializeApp(environment.firebaseConfig), AngularFireAuthModule, AngularFirestoreModule ], providers: [ StatusBar, SplashScreen, { provide: RouteReuseStrategy, useClass: IonicRouteStrategy } ], bootstrap: [AppComponent] }) export class AppModule {} |
At this point all the configuration of different services and our app is done, and we can finally focus on the objective of this tutorial: Implementing Apple Sign In!
Creating a Firebase Authentication Service
To help you easily integrate this new functionality in your project we are going to build everything important into a service.
This service keeps track of the authentication state of a user, and whenever a user logs in we immediately also grab the real user data, which you usually store inside another document in Firestore.
To create a new Firebase user we need and identiyToken, which is hopefully returned after a successful sign in with Apple.
The process is mostly the same as for other OAuth credentials: We create a custom provider with the Apple domain, we create the credentials with our token and call the sign in function for Firebase.
After the process is done we will also update the user document in our database since the general authentication object from Firebase can’t be changed and contains only limited information. This makes it also easier to retrieve user specific information in your app at a later point.
Go ahead and change your services/auth.service.ts to:
|
1 2 3 4 5 6 7 8 9 10 11 12 13 14 15 16 17 18 19 20 21 22 23 24 25 26 27 28 29 30 31 32 33 34 35 36 37 38 39 40 41 42 43 44 45 46 47 48 49 50 51 52 53 54 55 56 57 58 59 60 61 62 63 64 |
import { Injectable } from '@angular/core'; import * as firebase from 'firebase'; import { AngularFirestore, AngularFirestoreDocument } from '@angular/fire/firestore'; import { AngularFireAuth } from '@angular/fire/auth'; import { Observable, of } from 'rxjs'; import { switchMap } from 'rxjs/operators'; @Injectable({ providedIn: 'root' }) export class AuthService { user: Observable<any>; constructor(private afs: AngularFirestore, private afAuth: AngularFireAuth) { this.user = this.afAuth.authState.pipe( switchMap(user => { if (user) { return this.afs.doc<any>(`users/${user.uid}`).valueChanges(); } else { return of(null); } }) ); } async createFirebaseuser(appleResponse) { // Create a custom OAuth provider const provider = new firebase.auth.OAuthProvider('apple.com'); // Create sign in credentials with our token const credential = provider.credential({ idToken: appleResponse.identityToken }); // Call the sign in with our created credentials const userCredential = await this.afAuth.signInWithCredential(credential); // Update the user document in Firestore this.updateUserData(userCredential.user, appleResponse.givenName, appleResponse.familyName); } async updateUserData(user, firstName, lastName) { const userRef: AngularFirestoreDocument = this.afs.doc(`users/${user.uid}`); let data = { email: user.email }; // Only add names if they are set, otherwise we would override them if (firstName) { data['first_name'] = firstName; } if (lastName) { data['last_name'] = lastName; } return userRef.set(data, { merge: true }); } logout() { this.afAuth.signOut(); } } |
We also added a check for the name of the user, since the names will only be returned when the user goes through the Apple Sign In for the first time.
After this initial flow, these fields will be null and we don’t want to override our precious user data with that!
Building the Apple Sign In Flow
Now that we’ve created our core functionality in the service, building the rest of our app becomes a breeze.
First of all you should check on which platform your app runs, since the plugin we installed only works for native iOS apps.
For the login process, you only need to call the Authorize() function on the Capacitor plugin, which will then trigger the native Apple dialog. Once we get the result, we can pass the information to our service that will handle all the rest for us!
You can now change your app/home/home.page.ts to:
|
1 2 3 4 5 6 7 8 9 10 11 12 13 14 15 16 17 18 19 20 21 22 23 24 25 26 27 28 29 30 31 32 33 34 35 36 37 38 39 40 41 42 43 44 45 46 47 48 49 50 |
import { Component, OnInit } from '@angular/core'; import { AlertController } from '@ionic/angular'; import { AuthService } from '../services/auth.service'; import { Plugins } from '@capacitor/core'; const { Device, SignInWithApple } = Plugins; @Component({ selector: 'app-home', templateUrl: 'home.page.html', styleUrls: ['home.page.scss'], }) export class HomePage implements OnInit { showAppleSignIn = false; user = this.auth.user; constructor(private alertController: AlertController, private auth: AuthService) { } async ngOnInit() { // Only show the Apple sign in button on iOS const device = await Device.getInfo(); this.showAppleSignIn = device.platform === 'ios'; } openAppleSignIn() { SignInWithApple.Authorize().then(async res => { if (res.response && res.response.identityToken) { this.auth.createFirebaseuser(res.response); } else { this.presentAlert(); } }).catch(response => { this.presentAlert(); }); } logout() { this.auth.logout(); } async presentAlert() { const alert = await this.alertController.create({ header: 'Login Failed', message: 'Please try again later', buttons: ['OK'] }); await alert.present(); } } |
The response you get from Apple will have the following structure (for successful authentication):
|
1 2 3 4 5 6 7 8 9 10 |
{ "response": { "email": "foo@bar.com", "identityToken": "importantToken", "familyName": "Grimm", "user": "AppleUserId", "givenName": "Simon", "authorizationCode": "authCode" } } |
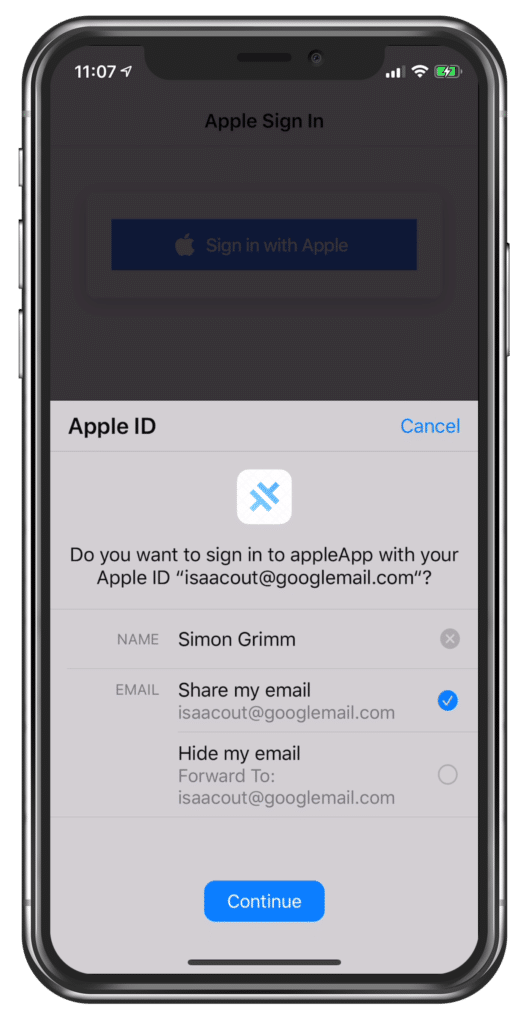
The response also depends on whether the users allow to show the email or hide it, in the latter case you will receive a more anonymous email from Apple which will forward all emails to the real user email.
It’s also important to note that you will see this full response only during the first successful sign in. After that, the familyName, givenName and email fields will be null, so be cautious if you use the information of this token to update your user records!
Note: I’ll show you a way to reset the whole process at the end so you can test it more than once!
The view is actually the most boring part of this tutorial – simply add a button and perhaps surround everything with a little check on the user Observable, so we can print out all the user information if we are logged in.
The following code goes to your app/home/home.page.html:
|
1 2 3 4 5 6 7 8 9 10 11 12 13 14 15 16 17 18 19 20 21 22 23 24 25 26 27 28 29 30 31 32 |
<ion-header> <ion-toolbar color="primary"> <ion-title> Apple Sign In </ion-title> </ion-toolbar> </ion-header> <ion-content class="ion-padding"> <ion-card *ngIf="!(user | async); else welcome"> <ion-card-content> <ion-button expand="full" (click)="openAppleSignIn()" *ngIf="showAppleSignIn"> <ion-icon name="logo-apple" slot="start"></ion-icon> Sign in with Apple </ion-button> </ion-card-content> </ion-card> <ng-template #welcome> <ion-card> <ion-card-header> <ion-card-title>Welcome back!</ion-card-title> </ion-card-header> <ion-card-content> {{ ( user | async) | json }} <ion-button expand="full" (click)="logout()">Logout</ion-button> </ion-card-content> </ion-card> </ng-template> </ion-content> |
Now we are ready, but in order to run everything successfully we also need to apply a little change to our native project.
Xcode Settings
You should have already added the iOS platform by now, so run a new build with your code changes and then open the workspace file of your project either from finder or by running:
|
1 2 |
ionic build && npx cap copy npx cap open ios |
Inside the Xcode project we need navigate to Signing & Capabilities -> Add Capability, and from the list select Sign In with Apple like you did in our first step inside your Apple identifier as well.
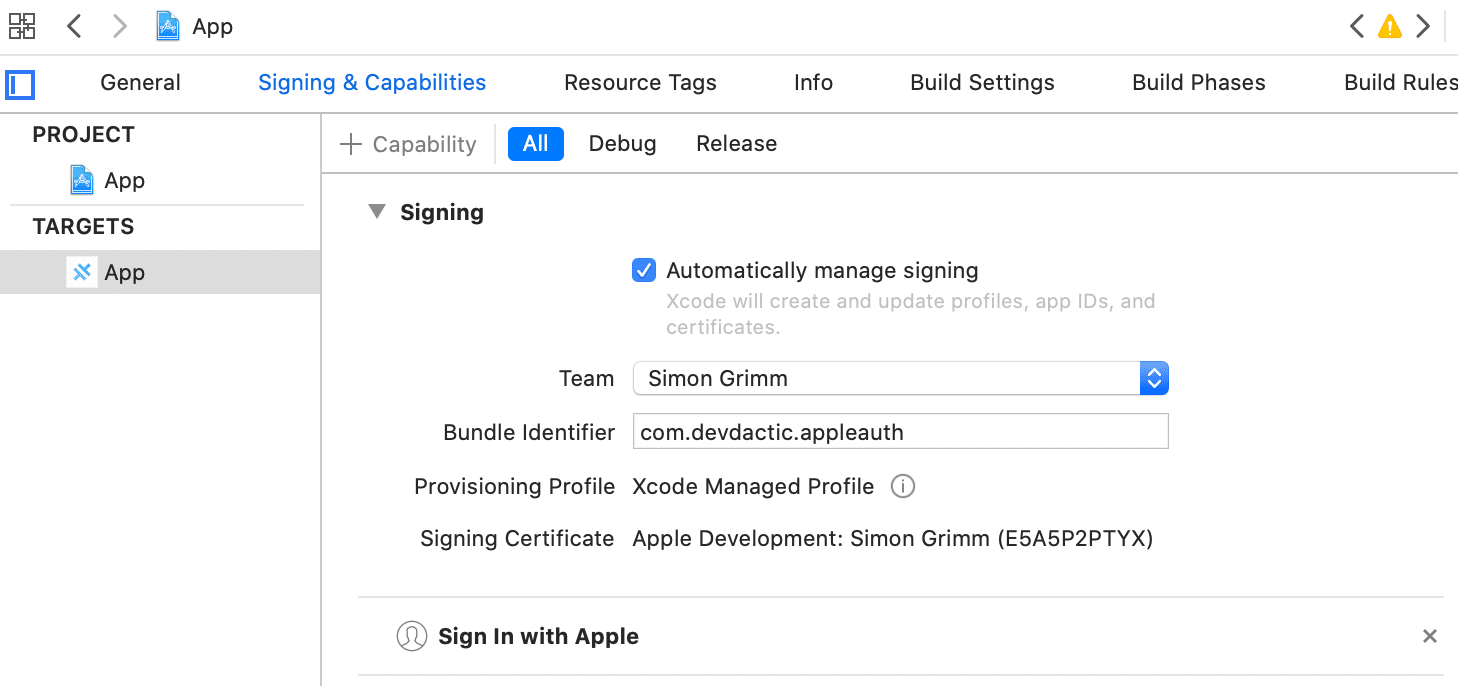
Now you can finally build the app on your device and go through the Apple Sign In flow – and you should also see the identity token of the Apple response printed in your card!
Testing Apple Sign In
In most cases you want to test the process a few times, but after going through the initial dialog once, you won’t see it again, even if you uninstall the app.
But here’s a fix to reset your data that allows you to perform everything fresh again: Inside your iOS device, open the settings app and navigate to Apple ID -> Password & Security -> Apple ID logins.
In this screen you can see all the apps where you used Apple Sign In, and you can simply delete the entry for your own app.
Now you can test the process again inside your app, and the initial dialog to sign in will show up again like in the image you see below.
Conclusion
Adding the general Sign In with Apple functionality isn’t that hard (besides some configuration), but making it work in combination with Firebase requires some additional steps.
Hopefully this Quick Win helped you to add this cool (and on iOS required!) functionality to your Ionic apps.
You can also find a video version of this Quick Win below.