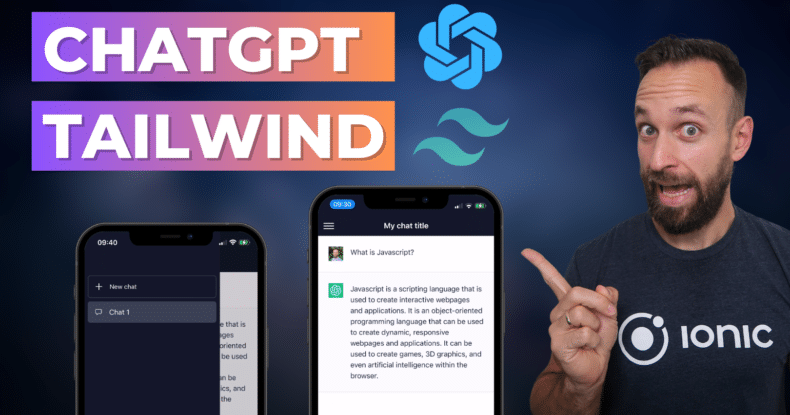
In this Quick Win, we will build a stylish ChatGPT UI with side menu using Ionic and TailwindCSS.
Why?
Because Ionic gives us great components while Tailwind offers great utilities, and combined you can easily crate powerful pages.
We won’t connect it to an actual API, but you can find a full course about Ionic with OpenAI integration the Ionic Academy as well!
The full quick win with snippets is only available to Ionic Academy members.
Join now for
- Unlimited access to all quick wins
- Library of 40+ step-by-step video courses
- Support for Ionic questions via Slack & private community
App Menu Setup
First of all we need a new Ionic app with a page for the menu template, and a content page for our chat. After that we can add Tailwind with a schematic like this:
|
1 2 3 4 5 6 7 |
ionic start chatUi blank --type angular cd ./chatUi ionic g page pages/chat ionic g page pages/menu ng add ngx-tailwind |
You can already select typography and forms during the Tailwind setup, or simply later open your tailwind.config.js and change it to:
|
1 2 3 4 5 6 7 8 |
/** @type {import('tailwindcss').Config} */ module.exports = { content: ["./src/**/*.{html,ts}"], theme: { extend: {}, }, plugins: [require("@tailwindcss/forms"), require("@tailwindcss/typography")], }; |
Now we also need to make the menu our initial page, so open the src/app/app-routing.module.ts and change it to:
|
1 2 3 4 5 6 7 8 9 10 11 12 13 14 15 16 17 18 |
import { NgModule } from '@angular/core'; import { PreloadAllModules, RouterModule, Routes } from '@angular/router'; const routes: Routes = [ { path: '', loadChildren: () => import('./pages/menu/menu.module').then((m) => m.MenuPageModule), }, ]; @NgModule({ imports: [ RouterModule.forRoot(routes, { preloadingStrategy: PreloadAllModules }), ], exports: [RouterModule], }) export class AppRoutingModule {} |
Finally let’s add some boilerplate code that defines our side menu using the Ionic split pane.
This makes sure that the side menu is actually present on the side on bigger screens, and hidden behind the classic burger icon on smaller screens!
Bring up the src/app/pages/menu/menu.page.html for this and change it to:
|
1 2 3 4 5 6 7 8 9 10 11 |
<ion-split-pane contentId="main" when="sm"> <ion-menu contentId="main"> <ion-header> <ion-toolbar> <ion-title>Menu</ion-title> </ion-toolbar> </ion-header> <ion-content> Menu items </ion-content> </ion-menu> <ion-router-outlet id="main"></ion-router-outlet> </ion-split-pane> |
Now we just need to define a child route for our menu, which is the chat page we initially created.
This goes into the array of children right inside the src/app/pages/menu/menu-routing.module.ts:
|
1 2 3 4 5 6 7 8 9 10 11 12 13 14 15 16 17 18 19 20 21 22 23 24 25 26 27 28 29 |
import { NgModule } from '@angular/core'; import { Routes, RouterModule } from '@angular/router'; import { MenuPage } from './menu.page'; const routes: Routes = [ { path: '', component: MenuPage, children: [ { path: 'chat', loadChildren: () => import('../chat/chat.module').then((m) => m.ChatPageModule), }, { path: '', redirectTo: 'chat', pathMatch: 'full', }, ], }, ]; @NgModule({ imports: [RouterModule.forChild(routes)], exports: [RouterModule], }) export class MenuPageRoutingModule {} |
Alright, at this point you have a basic side menu set up – let’s build this out with Tailwind!
Designing a custom Side Menu
To achieve the desired UI we can now combine Tailwind utility classes and Ionic components to align them, give them borders and padding and their ChatGPT like design.
Our view will consist of one button to start a new chat above a list with potential previous chat items. At the bottom is a section to clear the conversations, and we try to use Ionicons for the icons as good as possible!
Now start by changing the src/app/pages/menu/menu.page.html to:
|
1 2 3 4 5 6 7 8 9 10 11 12 13 14 15 16 17 18 19 20 21 22 23 24 25 26 27 28 29 30 31 32 33 34 |
<ion-split-pane when="sm" contentId="main"> <ion-menu contentId="main"> <ion-header> <ion-toolbar class="bg-gray-900"></ion-toolbar> </ion-header> <ion-content class="bg-gray-900 flex h-full"> <a class="flex m-2 py-3 px-3 items-center gap-3 rounded-md hover:bg-gray-500/10 duration-200 text-white cursor-pointer text-sm border border-white/20" > <ion-icon name="add" class="add-icon"></ion-icon> New chat</a > <ion-list class="bg-gray-900 m-2 border-b border-white/20 min-h-[50%]"> <div button routerLink="/chat" class="hover:cursor-pointer text-white"> <div class="px-4 h-full rounded-md bg-gray-700 flex items-center"> <ion-icon name="chatbox-outline"></ion-icon> <span class="px-4 my-3">Chat 1</span> </div> </div> </ion-list> <a class="flex m-3 py-3 px-3 items-center gap-3 hover:bg-gray-500/10 duration-200 text-white cursor-pointer text-sm" > <ion-icon name="trash-outline"></ion-icon> Clear conversations</a > </ion-content> </ion-menu> <!-- The main content --> <ion-router-outlet id="main"></ion-router-outlet> </ion-split-pane> |
We have also given this a dark background but it won’t work correctly until we also include the bg-gray-900 in our CSS file.
Therefore let’s use the Tailwind @apply function to add it to all relevant elements from our src/app/pages/menu/menu.page.scss:
|
1 2 3 4 5 6 7 8 9 10 |
ion-content, ion-item, ion-list, ion-toolbar { --background: @apply bg-gray-900; } .add-icon { font-size: 24px; } |
Run your code and the first half of the ChatGPT UI should be done!
Creating the Chat View
Now we move on to the actual chat view. For this page, let’s quickly define some dummy messages inside the src/app/pages/chat/chat.page.ts first:
|
1 2 3 4 5 6 7 8 9 10 11 12 13 14 15 16 17 18 19 20 21 22 23 24 25 26 27 28 29 |
import { Component, OnInit } from '@angular/core'; enum Creator { Me = 0, Bot = 1, } @Component({ selector: 'app-chat', templateUrl: './chat.page.html', styleUrls: ['./chat.page.scss'], }) export class ChatPage implements OnInit { messages = [ { text: 'What is Javascript?', from: Creator.Me, }, { text: 'Javascript is a scripting language that is used to create interactive webpages and applications. It is an object-oriented programming language that can be used to create dynamic, responsive webpages and applications. It can be used to create games, 3D graphics, and even artificial intelligence within the browser.', from: Creator.Bot, }, ]; constructor() {} ngOnInit() {} submit() {} } |
We can style the view with our dark color again, and the header will automatically show the menu button if we run on a small screen and the side menu is not visible (as opposed to bigger screens where it’s visible due to the split pane).
For our messages with can use an iteration and conditionally apply bg-gray-50 if it’s sent from the bot, and also use 2 different little images that I added to the assets folder. Simply add 2 of your pictures in the right place and use them as the avatar for a message.
In the footer we will place a custom div that uses flex and takes the full width on small devices or just 3/5 once the view becomes bigger. This is the chat message input area, which again is using an Ionic component as the ion-textarea offers a nice autogrow functionality out of the box!
Therefore bring up the src/app/pages/chat/chat.page.html and change it to:
|
1 2 3 4 5 6 7 8 9 10 11 12 13 14 15 16 17 18 19 20 21 22 23 24 25 26 27 28 29 30 31 32 33 34 35 36 37 38 39 40 |
<ion-header> <ion-toolbar class="bg-gray-900 text-white"> <ion-buttons slot="start"> <ion-menu-toggle> <ion-menu-button color="light"> </ion-menu-button> </ion-menu-toggle> </ion-buttons> <ion-title>My chat title</ion-title> </ion-toolbar> </ion-header> <ion-content> <div *ngFor="let msg of messages" class="flex gap-4 p-6 border-b border-black/10 text-gray-800" [ngClass]="{'bg-gray-50': msg.from === 1 }" > <img *ngIf="msg.from === 0" src="assets/simon.png" class="w-8 h-8" /> <img *ngIf="msg.from === 1" src="assets/bot.jpg" class="w-8 h-8" /> <p>{{ msg.text}}</p> </div> </ion-content> <ion-footer class="ion-no-border"> <ion-toolbar> <div class="m-2 relative flex h-full justify-center"> <div class="w-full md:w-3/5 py-2 md:px-4 relative border border-black/10 bg-white rounded-md shadow-[0_0_10px_rgba(0,0,0,0.10)]" > <ion-textarea autoGrow class="w-full pl-2 pr-7"></ion-textarea ><button (click)="submit()" class="absolute p-1 rounded-md text-gray-500 bottom-1.5 right-1 md:bottom-2.5 md:right-2 hover:bg-gray-100" > <ion-icon name="send"></ion-icon> </button> </div> </div> </ion-toolbar> </ion-footer> |
Just like before, we need to add some CSS to our src/app/pages/chat/chat.page.scss as well:
|
1 2 3 |
ion-toolbar { --background: @apply bg-gray-900; } |
And with that in place, we have finished our nice and clean ChatGPT UI with Ionic components, navigation and TailwindCSS styling!