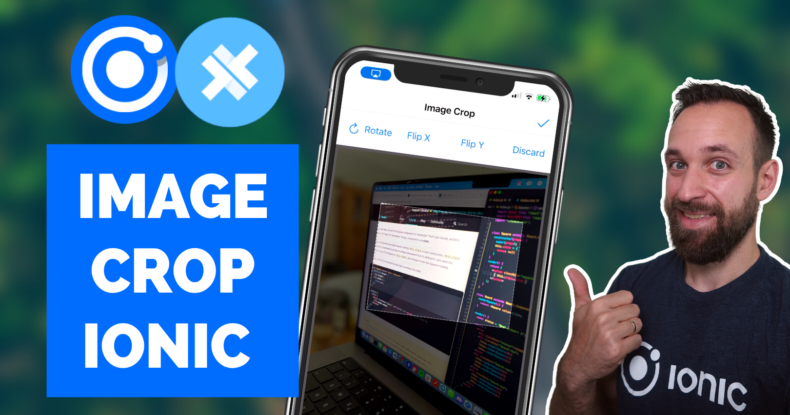
If you want to transform images that users upload in your app, you can do a lot of cropping and transforming with a super simple package!
In this Quick Win we will use the ngx-image-cropper library to create a simple image transformation app with Ionic Angular to apply some basic changes to a user captured image.
To make things more fun we will use Capacitor to capture the actual images in our app and use them as the input for our cropper component.
The full quick win with snippets is only available to Ionic Academy members.
Join now for
- Unlimited access to all quick wins
- Library of 40+ step-by-step video courses
- Support for Ionic questions via Slack & private community
Starting the Image Crop App
Let’s start with a blank new app and install our cropper package. To use pinch events we also need to install hammerjs – you don’t have to install this if you only want to use the app on the browser though.
|
1 2 3 4 5 6 7 8 9 10 11 12 13 14 15 |
ionic start academyCrop blank --type=angular cd ./academyCrop # Install the image cropper package npm i ngx-image-cropper # For mobile gestures npm i hammerjs # For image capturing npm i @capacitor/camera # Add native platforms ionic cap add ios ionic cap add android |
We also already installed the Capacitor camera package, and to use it inside a mobile app we need to ask the user for permissions.
Therefore go ahead and open the ios/App/App/Info.plist after adding the native platforms and add the following keys:
|
1 2 3 4 5 6 |
<key>NSCameraUsageDescription</key> <string>To capture images</string> <key>NSPhotoLibraryAddUsageDescription</key> <string>To save images</string> <key>NSPhotoLibraryUsageDescription</key> <string>To select images</string> |
We now need to do the same for Android, so bring up the android/app/src/main/AndroidManifest.xml and add towards the bottom:
|
1 2 |
<uses-permission android:name="android.permission.READ_EXTERNAL_STORAGE"/> <uses-permission android:name="android.permission.WRITE_EXTERNAL_STORAGE" /> |
Now we are basically finished, but in order to include the HammerJS package we need to add the following line to our src/main.ts:
|
1 |
import 'hammerjs'; |
At least this was required at the time writing this tutorial – probably it works with a different solution (or no HammerJS) in the future.
Adding Image Crop Functionality
When you want to include the Cropper component, you first need to import the module so in our case let’s open the src/app/home/home.module.ts and load it like this:
|
1 2 3 4 5 6 7 8 9 10 11 12 13 14 15 16 17 18 19 20 21 |
import { NgModule } from '@angular/core'; import { CommonModule } from '@angular/common'; import { IonicModule } from '@ionic/angular'; import { FormsModule } from '@angular/forms'; import { HomePage } from './home.page'; import { HomePageRoutingModule } from './home-routing.module'; import { ImageCropperModule } from 'ngx-image-cropper'; @NgModule({ imports: [ CommonModule, FormsModule, IonicModule, HomePageRoutingModule, ImageCropperModule, ], declarations: [HomePage], }) export class HomePageModule {} |
You could now also already use the example from the documentation to quickly see in in action.
However, we will take a slightly different path as we will use the camera to capture an image and then use the resulting base64 string as the input for the cropper component.
For this get started with some basic setup in our src/app/home/home.page.ts:
|
1 2 3 4 5 6 7 8 9 10 11 12 13 14 15 16 17 18 19 20 21 22 23 24 25 26 27 28 29 30 31 32 33 34 35 36 37 |
import { Component, ViewChild } from '@angular/core'; import { Capacitor } from '@capacitor/core'; import { ImageCroppedEvent, ImageCropperComponent, ImageTransform, } from 'ngx-image-cropper'; import { Camera, CameraResultType } from '@capacitor/camera'; import { LoadingController } from '@ionic/angular'; @Component({ selector: 'app-home', templateUrl: 'home.page.html', styleUrls: ['home.page.scss'], }) export class HomePage { @ViewChild('cropper') cropper: ImageCropperComponent; myImage: any = null; croppedImage: any = ''; transform: ImageTransform = {}; isMobile = Capacitor.getPlatform() !== 'web'; constructor(private loadingCtrl: LoadingController) {} async selectImage() { const image = await Camera.getPhoto({ quality: 100, allowEditing: true, resultType: CameraResultType.Base64, }); const loading = await this.loadingCtrl.create(); await loading.present(); this.myImage = `data:image/jpeg;base64,${image.base64String}`; this.croppedImage = null; } } |
We will keep the capture image data in myImage, and once we crop the image we will write it to croppedImage.
Additionally we can access the cropper component as a viewchild, and on that we can call the different functions and set the inputs of our cropper instance.
Let’s implement some of the possible functions right now and add them to our src/app/home/home.page.ts as well:
|
1 2 3 4 5 6 7 8 9 10 11 12 13 14 15 16 17 18 19 20 21 22 23 24 25 26 27 28 29 30 31 32 33 34 35 36 37 38 39 40 41 42 43 44 45 46 47 48 49 50 |
// Called when cropper is ready imageLoaded() { this.loadingCtrl.dismiss(); } // Called when we finished editing (because autoCrop is set to false) imageCropped(event: ImageCroppedEvent) { this.croppedImage = event.base64; } // We encountered a problem while loading the image loadImageFailed() { console.log('Image load failed!'); } // Manually trigger the crop cropImage() { this.cropper.crop(); this.myImage = null; } // Discard all changes discardChanges() { this.myImage = null; this.croppedImage = null; } // Edit the image rotate() { const newValue = ((this.transform.rotate ?? 0) + 90) % 360; this.transform = { ...this.transform, rotate: newValue, }; } flipHorizontal() { this.transform = { ...this.transform, flipH: !this.transform.flipH, }; } flipVertical() { this.transform = { ...this.transform, flipV: !this.transform.flipV, }; } |
Most of this is pretty basic stuff, the only real interesting observation is the transform object that we update: We will pass this object to our cropper component, and by updating it in our functions we can easily transform the image!
Next step is to add a button to capture an image or discard the process (which simply means to set the input source to null), and we can now also add the image-cropper component to our template.
Go ahead with the following and change the src/app/home/home.page.html to:
|
1 2 3 4 5 6 7 8 9 10 11 12 13 14 15 16 17 18 19 20 21 22 23 24 25 26 27 28 29 30 31 32 |
<ion-header> <ion-toolbar> <ion-title> Image Crop </ion-title> <ion-buttons slot="end"> <ion-button (click)="cropImage()" *ngIf="myImage"> <ion-icon slot="icon-only" name="checkmark"></ion-icon> </ion-button> </ion-buttons> </ion-toolbar> </ion-header> <ion-content> <ion-button (click)="selectImage()" expand="full" *ngIf="!myImage" >Select image</ion-button > <image-cropper #cropper [imageBase64]="myImage" [maintainAspectRatio]="true" [aspectRatio]="4 / 3" format="png" [hideResizeSquares]="isMobile" [transform]="transform" [autoCrop]="false" (imageCropped)="imageCropped($event)" (loadImageFailed)="loadImageFailed()" (imageLoaded)="imageLoaded()" ></image-cropper> <img [src]="croppedImage" *ngIf="croppedImage" /> </ion-content> |
Ok quite some options on our component – let’s talk about them:
- The
imageBase64is the input source in our case, but you could also use a blob, url or FileEvent - We don’t want to show the resize squares on a mobile device so we use
hideResizeSquares - The
transformtakes the values we define to easily transform the image - By setting
autoCropto false we can manually control when to crop the image - Additionally we catch some outputs to update our view or assign the resulting cropped image
Additionally we now also need a few buttons to trigger our functions, so go ahead and add the following row with buttons above the cropper component:
|
1 2 3 4 5 6 7 8 9 10 11 12 13 14 15 16 |
<ion-row *ngIf="myImage"> <ion-col size="3" class="ion-text-center"> <ion-button fill="clear" (click)="rotate()"> <ion-icon name="refresh" slot="start"></ion-icon> Rotate </ion-button> </ion-col> <ion-col size="3" class="ion-text-center"> <ion-button fill="clear" (click)="flipHorizontal()"> Flip X </ion-button> </ion-col> <ion-col size="3" class="ion-text-center"> <ion-button fill="clear" (click)="flipVertical()"> Flip Y </ion-button> </ion-col> <ion-col size="3" class="ion-text-center"> <ion-button fill="clear" (click)="discardChanges()"> Discard </ion-button> </ion-col> </ion-row> |
For reference let’s also overwrite the two existing CSS variables which you can use to style the overlay and background. For this bring up your src/app/home/home.page.scss and insert:
|
1 2 3 4 |
image-cropper { --cropper-outline-color: rgba(0, 0, 0, 0.642); --cropper-overlay-color: var(--ion-background-color); } |
Now we have a slightly darker overlay, and the background of the cropper component takes the same color as our background. We could also only render the component when we have an input image, but knowing about your options is always a good idea!
Recap
It’s actually super easy to build an Ionic Angular image crop based on real images captured with Capacitor. If you check out the documentation you will see a different way of using a file input, and you can use simply your preferred way to define the input for the cropper element.
After this, the rest is all the same and you can dive more into aspect ratios or transformations to get the most out of this package.
You can also find a video version of this Quick Win below.