With Ionic Framework v7 the ion-slides component was finally removed, and we need to find a new way to add slides to our Ionic application.
In this Quick Win we will integrate Swiper directly into our Ionic Angular application and see why it’s mostly the same and still super helpful.
Since the update to Swiper v9 the implementation slightly changed compared to the previous v8 Swiper with Ionic as Swiper is now a web component and not a specific Angular package anymore.

Nonetheless we will be able to implement the behavior just like ion-slides used to work in our Ionic application!
The full quick win with snippets is only available to Ionic Academy members.
Join now for
- Unlimited access to all quick wins
- Library of 40+ step-by-step video courses
- Support for Ionic questions via Slack & private community
Installing Swiper v9 with Ionic
To get started, bring up a new Ionic application and simply install the latest version of Swiper:
|
1 2 3 4 |
ionic start swiperApp blank --type=angular cd ./swiperApp npm i swiper@latest |
In order to register the web component from Swiper we need to call a register function once when our app starts, so bring up the src/app/app.component.ts and insert:
|
1 2 3 4 5 6 7 8 9 10 11 12 |
import { Component } from '@angular/core'; import { register } from 'swiper/element/bundle'; register(); @Component({ selector: 'app-root', templateUrl: 'app.component.html', styleUrls: ['app.component.scss'], }) export class AppComponent { constructor() {} } |
We are loading the full bundle here, but you could also pick only the required modules you need instead if you want to decrease the import size.
To use a web component we now need to import the CUSTOM_ELEMENTS_SCHEMA into the module of the page where we want to add Swiper.
For our blank app, we can do this inside the src/app/home/home.module.ts:
|
1 2 3 4 5 6 7 8 9 10 11 12 13 14 15 16 |
import { NgModule } from '@angular/core'; import { CommonModule } from '@angular/common'; import { IonicModule } from '@ionic/angular'; import { FormsModule } from '@angular/forms'; import { HomePage } from './home.page'; import { HomePageRoutingModule } from './home-routing.module'; import { CUSTOM_ELEMENTS_SCHEMA } from '@angular/core'; @NgModule({ imports: [CommonModule, FormsModule, IonicModule, HomePageRoutingModule], declarations: [HomePage], schemas: [CUSTOM_ELEMENTS_SCHEMA], }) export class HomePageModule {} |
That’s all you need to add Swiper to your Ionic app!
Basic Swiper Slides
You can now get started by simply adding the container and then how many slides you want in your src/app/home/home.page.html:
|
1 2 3 4 5 6 7 8 9 10 11 12 13 |
<ion-header> <ion-toolbar color="primary"> <ion-title> Ionic Swiper </ion-title> </ion-toolbar> </ion-header> <ion-content> <swiper-container> <swiper-slide>Slide 1</swiper-slide> <swiper-slide>Slide 2</swiper-slide> <swiper-slide>Slide 3</swiper-slide> </swiper-container> </ion-content> |
Without any styling, it will work as a swiper but only for the height of the text. To make Swiper take up the whole space of your page, simply add the following to your src/app/home/home.page.scss:
|
1 2 3 4 5 6 7 8 9 10 11 |
swiper-container { width: 100%; height: 100%; } swiper-slide { display: flex; flex-direction: column; align-items: center; justify-content: center; } |
This is now the most basic replacement of ion-slides and should cover most of your general needs already.
Swiper Options and Events
If you want more control, you can customize Swiper in many ways. To begin with, let’s add a pagination to the bottom and make the slides loop infinite by setting the parameters on our component.
Additionally, we want to listen to the event when a slide changes, and we can integrate that as well:
|
1 2 3 4 5 6 7 8 9 |
<swiper-container (slidechange)="swiperSlideChanged($event)" [loop]="true" [pagination]="true" > <swiper-slide>Slide 1</swiper-slide> <swiper-slide>Slide 2</swiper-slide> <swiper-slide>Slide 3</swiper-slide> </swiper-container> |
Now we just need to add an according function to our page, and we should see some logs whenever we slide:
|
1 2 3 4 5 6 7 8 9 10 11 12 13 14 |
import { Component } from '@angular/core'; @Component({ selector: 'app-home', templateUrl: 'home.page.html', styleUrls: ['home.page.scss'], }) export class HomePage { constructor() {} swiperSlideChanged(e: any) { console.log('changed: ', e); } } |
You can check out all parameters and events in the Swiper documentation as well.
Using Swiper Methods with Typescript
Sometimes you also need to control your Swiper element from code, and I couldn’t find an example of the right usage with Typescript.
But it’s possible, and quite easy.
Let’s add a few buttons to our page and give our Swiper container an Angular template reference. On top of that we will run some code after the component is initiated by using the afterinit event:
|
1 2 3 4 5 6 7 8 9 10 11 12 13 14 15 16 17 18 19 20 21 22 23 24 25 26 27 |
<ion-header> <ion-toolbar color="primary"> <ion-title> Ionic Swiper </ion-title> <ion-buttons slot="end"> <ion-button (click)="goPrev()"> <ion-icon slot="icon-only" name="arrow-back"></ion-icon> </ion-button> <ion-button (click)="goNext()"> <ion-icon slot="icon-only" name="arrow-forward"></ion-icon> </ion-button> </ion-buttons> </ion-toolbar> </ion-header> <ion-content> <swiper-container #swiper (afterinit)="swiperReady()" (slidechange)="swiperSlideChanged($event)" [loop]="true" [pagination]="true" > <swiper-slide>Slide 1</swiper-slide> <swiper-slide>Slide 2</swiper-slide> <swiper-slide>Slide 3</swiper-slide> </swiper-container> </ion-content> |
In that event, we use the view child and extract the Swiper element into its own variable, which is using the right Swiper type from the package.
With that in place, we can now use it to access all methods directly from code, like navigating to the next or previous slide:
|
1 2 3 4 5 6 7 8 9 10 11 12 13 14 15 16 17 18 19 20 21 22 23 24 25 26 27 28 29 30 31 |
import { Component, ElementRef, ViewChild } from '@angular/core'; import { Swiper } from 'swiper'; @Component({ selector: 'app-home', templateUrl: 'home.page.html', styleUrls: ['home.page.scss'], }) export class HomePage { @ViewChild('swiper') swiperRef: ElementRef | undefined; swiper?: Swiper; constructor() {} swiperSlideChanged(e: any) { console.log('changed: ', e); } swiperReady() { this.swiper = this.swiperRef?.nativeElement.swiper; } goNext() { this.swiper?.slideNext(); } goPrev() { this.swiper?.slidePrev(); } } |
You can also check out all events in the documentation!
Custom Swiper Styling
If you want to make it yours, you can inject some styling where CSS variables are used inside the Swiper component. For example, this could would change the bullets at the bottom when using pagination:
|
1 2 3 4 5 6 7 |
swiper-container { width: 100%; height: 100%; --swiper-pagination-bullet-inactive-color: var(--ion-color-step-200, #cccccc); --swiper-pagination-color: var(--ion-color-primary, #3880ff); } |
Besides that, you can also directly style most of the general elements like the background without using CSS variables.
Ionic Image Zoom with Swiper
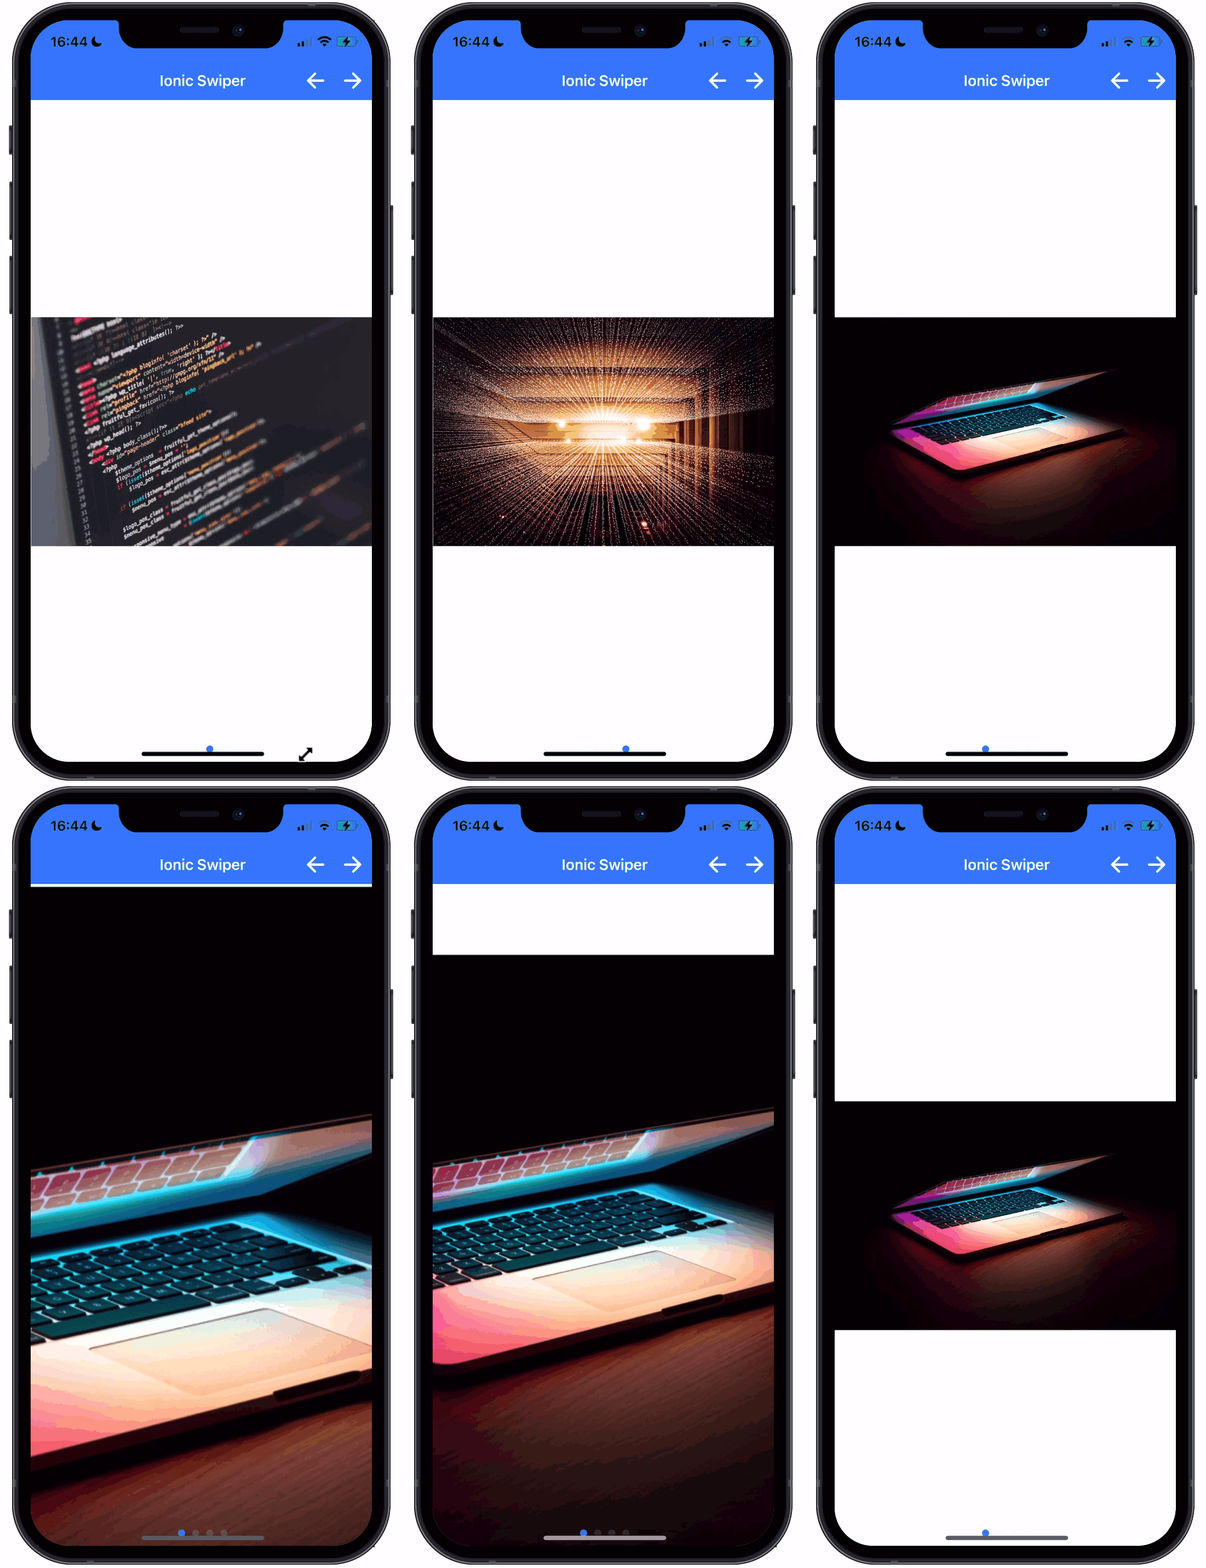
To zoom into images we always used ion-slides, and we can easily add zoom functionality to images again with Swiper.
To achieve this, let’s first add an array of images to our page:
|
1 2 3 4 5 6 7 8 9 10 11 12 13 14 15 16 17 18 19 20 21 22 23 |
import { Component, ElementRef, ViewChild } from '@angular/core'; import { IonicSlides } from '@ionic/angular'; import { Swiper } from 'swiper'; @Component({ selector: 'app-home', templateUrl: 'home.page.html', styleUrls: ['home.page.scss'], }) export class HomePage { @ViewChild('swiper') swiperRef: ElementRef | undefined; swiper?: Swiper; images = [ 'https://images.unsplash.com/photo-1580927752452-89d86da3fa0a', 'https://images.unsplash.com/photo-1498050108023-c5249f4df085', 'https://images.unsplash.com/photo-1461749280684-dccba630e2f6', 'https://images.unsplash.com/photo-1488229297570-58520851e868', ]; constructor() {} } |
Now all you have to do is wrap your slide content in a div with the swiper-zoom-container class and enabling zoom on your Swiper component:
|
1 2 3 4 5 6 7 8 9 10 11 12 13 14 15 16 |
<ion-content scrollY="false"> <swiper-container #swiper (afterinit)="swiperReady()" (slidechange)="swiperSlideChanged($event)" [loop]="true" [pagination]="true" [zoom]="true" > <swiper-slide *ngFor="let image of images"> <div class="swiper-zoom-container"> <img [src]="image" /> </div> </swiper-slide> </swiper-container> </ion-content> |
You can also define the zoom more granular, but for started this allows us to easily zoom images with Ionic and Swiper!
On top of the shown features, there’s more to explore like different effects or modules. All of that should work nicely in your app, so check out the swiper docs, and don’t be sad about the remove ion-slides anymore!
