When working with external libraries and NPM packages, you sometimes need to load those files in a different way than the rest of your packages is already loaded.
In this Quick Win you will see how to easily install and integrate those plugins so you can use them just like any other library in your general Ionic workflow. Afterwards you can load CSS or JS files directly during the build process of your app.
1. Install dependencies
Of course you start by installing a NPM package to your Ionic app. In this case, I used the css-animator package to easily add animations to my app:
|
1 |
npm install css-animator animate.css --save |
For most packages you only need to follow their instructions for installation and installing the dependency is enough. However, this lib was relying on another library and their CSS file, so I had to copy that file (I didn’t want to use the CDN file).
2. Create custom copy config
For this case we can create a custom copy config which will be executed during the build process. Ionic makes this really easy, so you can always be sure that you have the power to make tweaks to the build process!
This config will then take care of copying the CSS file into the build folder, just like your service-worker or assets are copied.
We start by adding an entry to our package.json which passes a custom config to the ionic_copy hook:
|
1 2 3 |
"config": { "ionic_copy": "./config/copy.config.js" } |
Now we need to go ahead and create this file, therefore create a folder config at the root of your project and inside a file named copy.config.js.
This file is based on the original Ionic source file which will be used if you don’t specify anything here!
You can copy that file and add an entry to copy your CSS or JS or use my code below. I only added the copyAnimateCss section which copies the CSS file out of the node_modules folder right into the build folder:
|
1 2 3 4 5 6 7 8 9 10 11 12 13 14 15 16 17 18 19 20 21 22 23 24 25 26 |
module.exports = { copyAssets: { src: ['{{SRC}}/assets/**/*'], dest: '{{WWW}}/assets' }, copyIndexContent: { src: ['{{SRC}}/index.html', '{{SRC}}/manifest.json', '{{SRC}}/service-worker.js'], dest: '{{WWW}}' }, copyFonts: { src: ['{{ROOT}}/node_modules/ionicons/dist/fonts/**/*', '{{ROOT}}/node_modules/ionic-angular/fonts/**/*'], dest: '{{WWW}}/assets/fonts' }, copyPolyfills: { src: ['{{ROOT}}/node_modules/ionic-angular/polyfills/polyfills.js'], dest: '{{BUILD}}' }, copySwToolbox: { src: ['{{ROOT}}/node_modules/sw-toolbox/sw-toolbox.js'], dest: '{{BUILD}}' }, copyAnimateCss: { src: './node_modules/animate.css/animate.css', dest: '{{BUILD}}' } } |
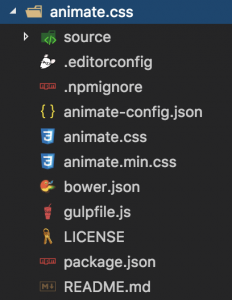
To find the correct path, just check your node_modules folder and find the installed plugin. In my case this was the packages folder:
From that folder you can gather the right path, now there’s only one step missing.
3. Load in your App
We have installed the package and copied it during build, now we need to acutally link to it and use it!
To do this last step, open your src/index.html and somewehre inside the head (for CSS) add an entry like this:
|
1 2 3 4 5 |
<head> <!-- other head stuff.. --> <link rel="stylesheet" href="build/animate.css"> </head> |
Remember, the file was copied directly to the build folder, and that’s the place our app will find it during runtime.
No we don’t need to use any external hosted CDN files and our “problematic” package is perfectly integrated into our Ionic workflow!


Thank you so much for this article! It helped me a lot when I was trying to integrate materializecss through angular2-materialize npm package in my ionic app. I spent a whole week trying to do that before and nothing was working, until I followed your instructions and now everything worked so nicely. For sure I will became a Ionic Academy member as soon as I get money to pay that. Thanks a lot!
Hey Isaac, glad you got it working! If you know the trick it’s really super simple 🙂 See you inside!
I have been following your post on this topic, from SO to ionicforum and now here, why don’t you simply outline how you implemented materializecss in your app, i have the same problem right now please,rather than just saying thanks.
If you install a package with npm and reference it using import statements, isn’t the code automatically bundled in with your app?
This does not work for me (ionic-angular 3.2.1).
I add the “config” part to the package.json and create “./config/copy.config.js” with the original content (without adding my custom instructions).
Then I call “ionic serve” and get the following error: “[ERROR] app-scripts serve unexpectedly failed.settings: undefinedcontext: [object Object]”
Any ideas on this issue?
not working for me, any changes to index.html are instantly deleted on ionic:serve/build.
Appears to not work, when running ionic serve there is a console error. ‘Failed to load resource: the server responded with a status of 404 (Not Found) animate.css’
Thanks! It worked ! I put Bootstrap 4.1.1 in my Ionic 3 App, and I just loaded bootstrap.bundle.js and jquery.min.js exactly in this order at the bottom of module.exports list from copy.config.js, and put scripts in index.html with jquery.min.js first, then bootstrap.bundle.js, besides a whole other config for sass (sass.config.js), then it worked ! ! !