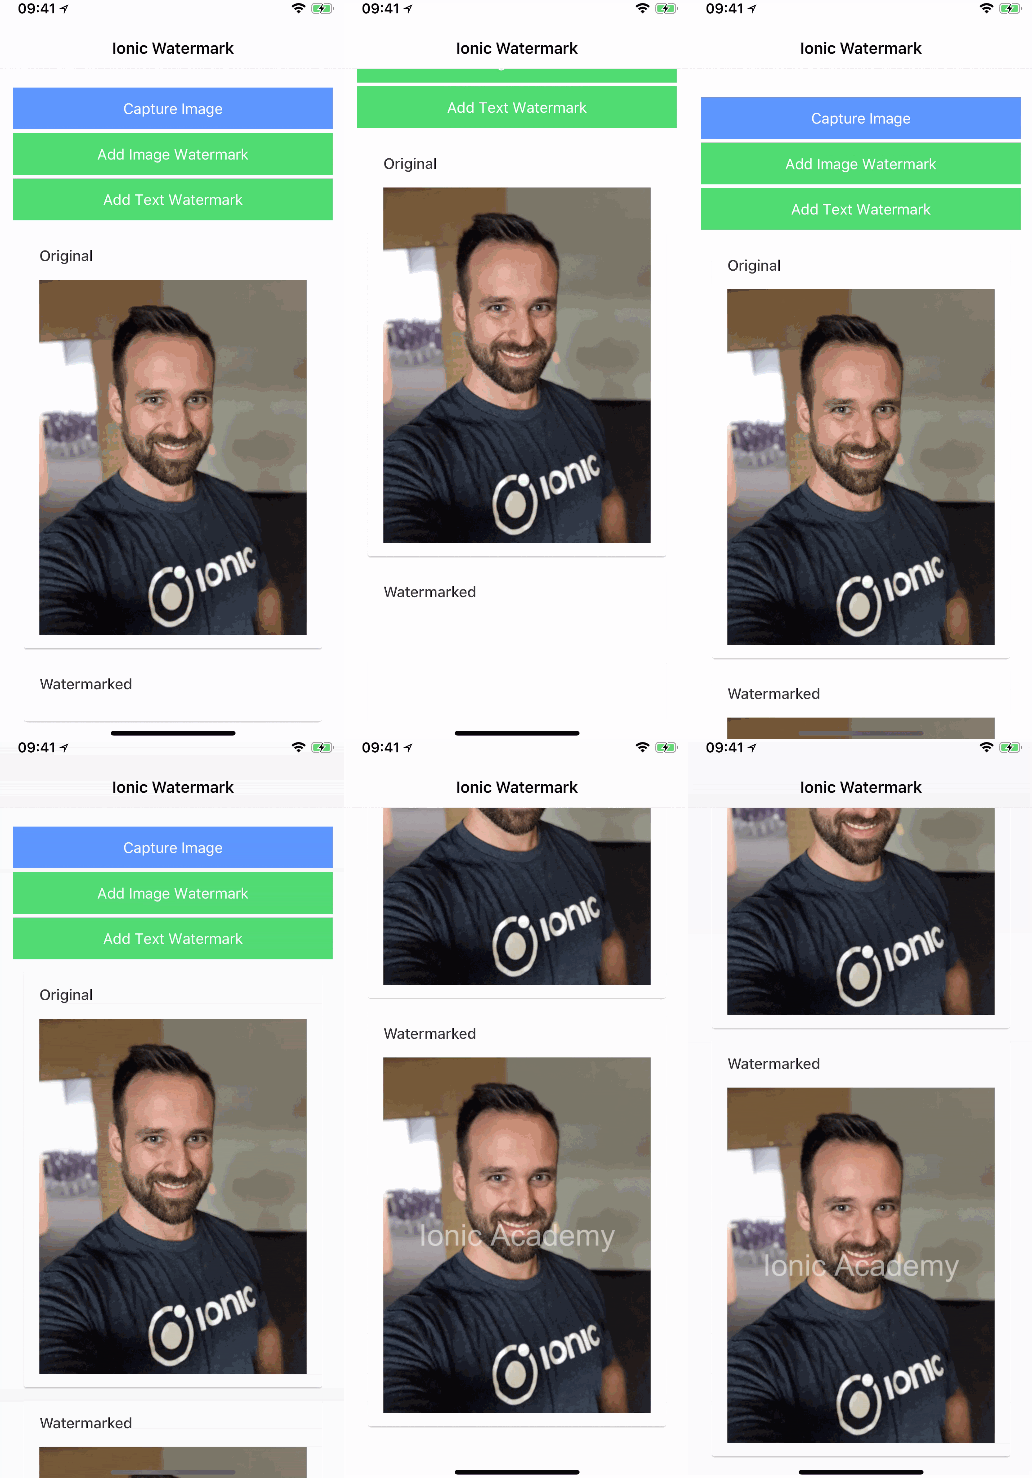
We’ve had several articles around using images in the past, but one question was asked many times and was unanswered until today: How to add a watermark to an image?
Inside this Quick Win we will use a library called watermarkjs to add watermarks either in form of an image or just as a text over an image we captured before using Ionic.

The result will be the simple app above which allows to first capture and image and then apply the watermark. Of course the whole process could be automated in the background as well!
Starting our Ionic Watermark App
To get started we simple set up a blank Ionic app and add both the watermarkjs package and also the Ionic native camera so we can use our own images. Make sure to also add the Cordova plugin, so go ahead and run:
|
1 2 3 |
ionic start watermark blank npm i @ionic-native/camera watermarkjs ionic cordova plugin add cordova-plugin-camera |
As always we now need to add the camera to the array of our providers inside the app/app.module.ts like this:
|
1 2 3 4 5 6 7 8 9 10 11 12 13 14 15 16 17 18 19 20 21 22 23 24 25 26 27 28 29 30 31 32 |
import { BrowserModule } from '@angular/platform-browser'; import { ErrorHandler, NgModule } from '@angular/core'; import { IonicApp, IonicErrorHandler, IonicModule } from 'ionic-angular'; import { SplashScreen } from '@ionic-native/splash-screen'; import { StatusBar } from '@ionic-native/status-bar'; import { MyApp } from './app.component'; import { HomePage } from '../pages/home/home'; import { Camera } from '@ionic-native/camera'; @NgModule({ declarations: [ MyApp, HomePage ], imports: [ BrowserModule, IonicModule.forRoot(MyApp) ], bootstrap: [IonicApp], entryComponents: [ MyApp, HomePage ], providers: [ StatusBar, SplashScreen, {provide: ErrorHandler, useClass: IonicErrorHandler}, Camera ] }) export class AppModule {} |
There’s no additional setup for the watermark library and we can use it directly inside our class later.
Capture Images and add Watermark
Inside our app we want to start the fun by letting the user capture an image. The whole logic would of course also work with local files, but wouldn’t that be a bit boring?
Therefore, we need buttons to capture and image and also to run our watermark functions. Those buttons will be available if we got an image or more precise the blobImage which we will generate from the image result.
Below the buttons we simply add two cards, one for the original image and the second for the watermarked image. The second image will be used as a ViewChild, but actually this would also work with the way of the first image. Just some interesting elements here and there!
Now go ahead and change your pages/home/home.html to:
|
1 2 3 4 5 6 7 8 9 10 11 12 13 14 15 16 17 18 19 20 21 22 23 24 25 26 27 |
<ion-header> <ion-navbar> <ion-title> Ionic Watermark </ion-title> </ion-navbar> </ion-header> <ion-content padding> <button ion-button full (click)="captureImage()">Capture Image</button> <button ion-button full color="secondary" (click)="addImageWatermark()" [disabled]="!blobImage">Add Image Watermark</button> <button ion-button full color="secondary" (click)="addTextWatermark()" [disabled]="!blobImage">Add Text Watermark</button> <ion-card *ngIf="originalImage"> <ion-card-header>Original</ion-card-header> <ion-card-content> <img [src]="originalImage"> </ion-card-content> </ion-card> <ion-card *ngIf="originalImage"> <ion-card-header>Watermarked</ion-card-header> <ion-card-content> <img #previewimage> </ion-card-content> </ion-card> </ion-content> |
Now it’s time to eat the real functions. First, we gonna capture an image following the usual way. In this case we pick the DATA_URL as return value so we can use the image directly as base64 string and also to transform it.
The watermark package expects a path to a file (which works great with local assets) which was not really working well with iOS and the WKWebView. Therefore, with a little trick using fetch() we transform the result to a blob that we then store inside blobImage.
Then, the functions to add the watermark make use of this blob and either apply a local image (make sure to add one to your project) at the lower right side of the original image or simply add written text onto the image.
Make sure that you got the watermark import correctly at the top, because there are not yet typings available and we need to import it differently than the usual packages.
Once the watermark functions returns, we get a whole image object back but we can read out the src element and set it to our viewchilds native element. Again, we could also use the source like we did with the original image!
This image now has the watermark and not only displayed with a fake layer but really inside the image and could be used in other ways inside your app!
To get all of this, change your pages/home/home.ts to:
|
1 2 3 4 5 6 7 8 9 10 11 12 13 14 15 16 17 18 19 20 21 22 23 24 25 26 27 28 29 30 31 32 33 34 35 36 37 38 39 40 41 42 43 44 45 46 47 48 49 50 51 52 53 54 55 56 |
import { Component, ViewChild, ElementRef } from '@angular/core'; import { NavController } from 'ionic-angular'; import { Camera, CameraOptions } from '@ionic-native/camera'; import * as watermark from 'watermarkjs'; @Component({ selector: 'page-home', templateUrl: 'home.html' }) export class HomePage { @ViewChild('previewimage') waterMarkImage: ElementRef; originalImage = null; blobImage = null; constructor(public navCtrl: NavController, private camera: Camera) { } captureImage() { const options: CameraOptions = { quality: 100, destinationType: this.camera.DestinationType.DATA_URL, encodingType: this.camera.EncodingType.JPEG, mediaType: this.camera.MediaType.PICTURE, sourceType: this.camera.PictureSourceType.PHOTOLIBRARY } this.camera.getPicture(options).then((imageData) => { this.originalImage = 'data:image/jpeg;base64,' + imageData; fetch(this.originalImage) .then(res => res.blob()) .then(blob => { this.blobImage = blob; }); }, (err) => { // Handle error }); } addImageWatermark() { watermark([this.blobImage, 'assets/imgs/academy.png']) .image(watermark.image.lowerRight(0.6)) .then(img => { this.waterMarkImage.nativeElement.src = img.src; }); } addTextWatermark() { watermark([this.blobImage]) .image(watermark.text.center('Ionic Academy', '260px Arial', '#fff', 0.5)) .then(img => { this.waterMarkImage.nativeElement.src = img.src; }); } } |
For all functions of the watermarkjs package you can also check out the documentation with examples.
It’s actually really easy to use but adds a very cool unique look to your images!
You can also find a video version of this Quick Win below.
