If you want to build a PWA with video capturing capabilities, you are lucky since the MediaRecorder API is now available in almost every browser!
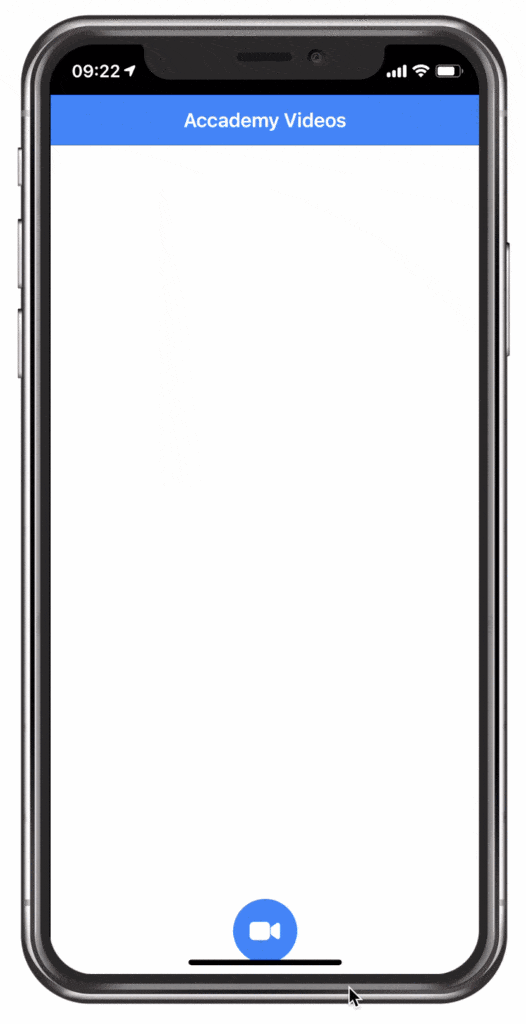
In this Quick Win we will implement a PWA that can capture, store and play videos. Be aware that the approach won’t work inside a native app and only inside the browser/PWA, but you can easily fall back to Cordova plugins for a real app if you want to.
You can also check out and test the PWA yourself here.

To finally play our video files we will also use the Capacitor Video player plugin.
Starting our Video Capture App
To get started create a new Ionic app with Capacitor enabled. Then we need to install the typings for the Media recorder to correctly use it with Typescript and also the Capacitor plugin for our video player.
Finally add the PWA schematics so you can easily build and test the app later:
|
1 2 3 4 5 6 7 8 9 10 11 12 |
ionic start academyVideo blank --type=angular --capacitor cd ./academyVideo ionic g service services/video # TS typings npm i -D @types/dom-mediacapture-record # Video player plugin npm install capacitor-video-player # PWA ready ng add @angular/pwa |
In order to use the installed typings correctly I also had to modify the tsconfig.app.json and add it to the types array:
|
1 2 3 4 |
"compilerOptions": { "outDir": "./out-tsc/app", "types": ["dom-mediacapture-record"] }, |
The rest is pure web technology so let’s dive in!
Storing & Loading Videos with Capacitor
Before we really capture the videos, we create a bit of logic to keep track of our videos. We will store the files inside the Filesystem of the app, and we store the path to our files inside the Capacitor storage.
To store the video, which is a blob, we need to first convert it to a base64 string using a helper function.
Once we got the base64 data we can write it to the filesystem, add the path to the file to our local videos array and also save the information to the storage.
Now go ahead and change the services/video.service.ts to:
|
1 2 3 4 5 6 7 8 9 10 11 12 13 14 15 16 17 18 19 20 21 22 23 24 25 26 27 28 29 30 31 32 33 34 35 36 37 38 39 40 41 42 43 44 45 46 47 48 49 50 51 52 53 54 55 56 57 58 59 60 61 |
import { Injectable } from '@angular/core'; import { Plugins, FilesystemDirectory } from '@capacitor/core'; const { Filesystem, Storage } = Plugins; @Injectable({ providedIn: 'root' }) export class VideoService { public videos = []; private VIDEOS_KEY: string = 'videos'; constructor() {} async loadVideos() { const videoList = await Storage.get({ key: this.VIDEOS_KEY }); this.videos = JSON.parse(videoList.value) || []; return this.videos; } async storeVideo(blob) { const fileName = new Date().getTime() + '.mp4'; const base64Data = await this.convertBlobToBase64(blob) as string; const savedFile = await Filesystem.writeFile({ path: fileName, data: base64Data, directory: FilesystemDirectory.Data }); // Add file to local array this.videos.unshift(savedFile.uri); // Write information to storage return Storage.set({ key: this.VIDEOS_KEY, value: JSON.stringify(this.videos) }); } // Helper function private convertBlobToBase64 = (blob: Blob) => new Promise((resolve, reject) => { const reader = new FileReader; reader.onerror = reject; reader.onload = () => { resolve(reader.result); }; reader.readAsDataURL(blob); }); // Load video as base64 from url async getVideoUrl(fullPath) { const path = fullPath.substr(fullPath.lastIndexOf('/') + 1); const file = await Filesystem.readFile({ path: path, directory: FilesystemDirectory.Data }); return `data:video/mp4;base64,${file.data}`; } } |
At the end we also got a function to get the video, because the player won’t play the video from the file URL directly (or I didn’t found the right way). But we can easily load the file from the path that we stored, and then return the file data as the correct base64 string back.
Creating the Video Capture View
With our logic in place we can continue to the implementation of our capturing. The basic idea is to get a stream of video data, which we can display in a viewchild in our template later.
We can then use the MediaRecorder API with the stream we created, which can then be used to capture chunks of data inside the ondataavailable. This means, we can store these chunks of data while the video capturing is in progress, and once we end the capturing we enter the onstop function.
Here we can use the previously created array of video data chunks to create a new blob and then pass this blob to our service, which will handle the storing of that file.
The last function to play a video also makes use of our service to get the base64 data of a video from the path of the video file, and the player plugin we installed handles the rest.
Now open the home/home.page.ts and change it to:
|
1 2 3 4 5 6 7 8 9 10 11 12 13 14 15 16 17 18 19 20 21 22 23 24 25 26 27 28 29 30 31 32 33 34 35 36 37 38 39 40 41 42 43 44 45 46 47 48 49 50 51 52 53 54 55 56 57 58 59 60 61 62 63 64 65 66 67 68 69 70 71 72 73 74 75 76 77 78 79 80 81 82 83 84 85 86 87 88 89 90 |
import { Component, ViewChild, ElementRef, AfterViewInit, ChangeDetectorRef } from '@angular/core'; import { VideoService } from '../services/video.service'; import { Capacitor, Plugins } from '@capacitor/core'; import * as WebVPPlugin from 'capacitor-video-player'; const { CapacitorVideoPlayer } = Plugins; @Component({ selector: 'app-home', templateUrl: 'home.page.html', styleUrls: ['home.page.scss'], }) export class HomePage implements AfterViewInit { @ViewChild('video') captureElement: ElementRef; mediaRecorder: any; videoPlayer: any; isRecording = false; videos = []; constructor(public videoService: VideoService, private changeDetector: ChangeDetectorRef) { } async ngAfterViewInit() { this.videos = await this.videoService.loadVideos(); // Initialise the video player plugin if (Capacitor.isNative) { this.videoPlayer = CapacitorVideoPlayer; } else { this.videoPlayer = WebVPPlugin.CapacitorVideoPlayer } } async recordVideo() { // Create a stream of video capturing const stream = await navigator.mediaDevices.getUserMedia({ video: { facingMode: 'user' }, audio: true }); // Show the stream inside our video object this.captureElement.nativeElement.srcObject = stream; var options = {mimeType: 'video/webm'}; this.mediaRecorder = new MediaRecorder(stream, options); let chunks = []; // Store the video on stop this.mediaRecorder.onstop = async (event) => { const videoBuffer = new Blob(chunks, { type: 'video/webm' }); await this.videoService.storeVideo(videoBuffer); // Reload our list this.videos = this.videoService.videos; this.changeDetector.detectChanges(); } // Store chunks of recorded video this.mediaRecorder.ondataavailable = (event) => { if (event.data && event.data.size > 0) { chunks.push(event.data) } } // Start recording wth chunks of data this.mediaRecorder.start(100); this.isRecording = true; } stopRecord() { this.mediaRecorder.stop(); this.mediaRecorder = null; this.captureElement.nativeElement.srcObject = null; this.isRecording = false; } async play(video) { // Get the video as base64 data const realUrl = await this.videoService.getVideoUrl(video); // Show the player fullscreen await this.videoPlayer.initPlayer({ mode: 'fullscreen', url: realUrl, playerId: 'fullscreen', componentTag: 'app-home' }); } } |
To finally make everything work we need a special video element which acts as the viewchild and displays the stream of the video while capturing.
Additionally we need a special div for the video player, which is required by the plugin!
Finally our list displays all the captured and stored videos with a play function, and the fab button is used both for starting and stopping the recording by using the isRecording variable that we toggle in our class.
Open the home/home.page.html and change it to this now:
|
1 2 3 4 5 6 7 8 9 10 11 12 13 14 15 16 17 18 19 20 21 22 23 24 25 26 27 |
<ion-header> <ion-toolbar color="primary"> <ion-title> Accademy Videos </ion-title> </ion-toolbar> </ion-header> <ion-content> <!-- Display the video stream while capturing --> <video class="video" #video autoplay playsinline muted [hidden]="!isRecording"></video> <!-- Neccessary for the video player --> <div id="fullscreen" slot="fixed"></div> <ion-list *ngIf="!isRecording"> <ion-item *ngFor="let video of videos;" (click)="play(video)" tappable> {{ video }} </ion-item> </ion-list> <ion-fab vertical="bottom" horizontal="center" slot="fixed"> <ion-fab-button (click)="isRecording ? stopRecord() : recordVideo()"> <ion-icon [name]="isRecording ? 'stop' : 'videocam'"></ion-icon> </ion-fab-button> </ion-fab> </ion-content> |
As a final fix I also had to give the video element a specific size to make it visible on all browser, but feel free to play around with those values inside the home/home.page.scss:
|
1 2 3 4 |
.video { width: 100%; height: 400px; } |
You can now test your app locally with serve or deploy it as a PWA for example to Firebase!
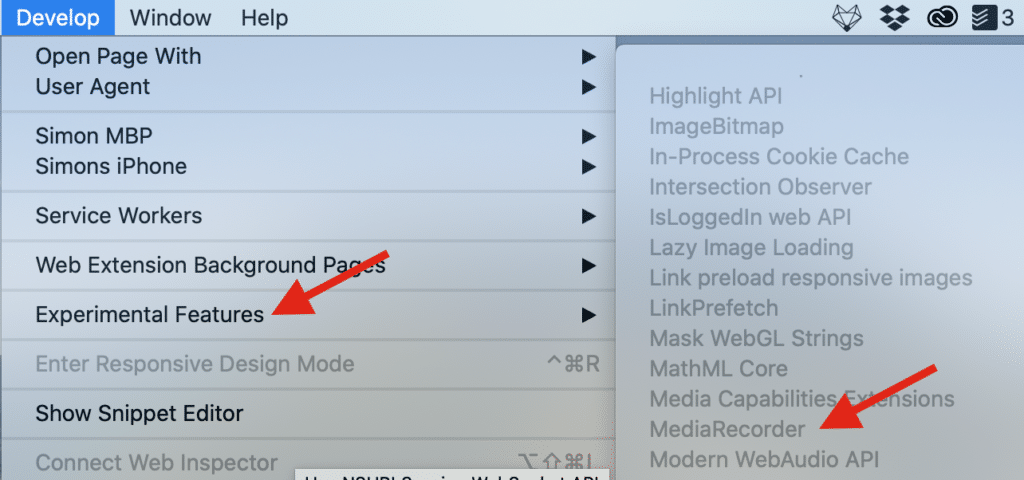
If you experience problems on iOS or Safari on a mac, you need to enable the Mediarecorder API which was still marked as experimental at the time writing and turned off by default!

The same setting can be found on iOS inside Settings -> Safari -> Advanced -> Experimental Features!
Conclusion
The web is making progress every year, and although iOS is sometimes a bit behind, the MediaRecorder API should be enabled by default pretty soon!
Keep in mind that this will now only work inside a PWA, for a native app through the app store you should use the according Cordova / Capacitor plugins instead.
You can also find a video version of this Quick Win below.
