If you want to display PDFs or external pages inside your app you can use the regular browser, but it feels like people are leaving your app. A better way to present a more consistent UI to your users is to use something called Themeable Browser.
In this Quick Win we will go through the basics of creating a new Themeable Browser for our Ionic app and how to work with the custom actions. Also, we are using some free icons I got from here.
Getting Started
Like always we start with a new Ionic app and install the Cordova plugin for the Themeable browser, so go ahead and run:
|
1 2 3 4 |
ionic start themeableBrowser blank cd themeableBrowser npm install --save @ionic-native/themeable-browser ionic cordova plugin add cordova-plugin-themeablebrowser |
Once this is done you need to add it to your src/app/app.module.ts and the providers array like this:
|
1 2 3 4 5 6 7 8 9 10 11 12 13 14 15 16 17 18 19 20 21 22 23 24 25 26 27 28 29 30 31 32 |
import { BrowserModule } from '@angular/platform-browser'; import { ErrorHandler, NgModule } from '@angular/core'; import { IonicApp, IonicErrorHandler, IonicModule } from 'ionic-angular'; import { SplashScreen } from '@ionic-native/splash-screen'; import { StatusBar } from '@ionic-native/status-bar'; import { MyApp } from './app.component'; import { HomePage } from '../pages/home/home'; import { ThemeableBrowser } from '@ionic-native/themeable-browser'; @NgModule({ declarations: [ MyApp, HomePage ], imports: [ BrowserModule, IonicModule.forRoot(MyApp) ], bootstrap: [IonicApp], entryComponents: [ MyApp, HomePage ], providers: [ StatusBar, SplashScreen, {provide: ErrorHandler, useClass: IonicErrorHandler}, ThemeableBrowser ] }) export class AppModule {} |
Now we are ready to create our own stylish browser instance inside our app!
Opening the Themeable Browser
First of all we need a button to open our new browser, perhaps this is the most basic snippet I’ve ever posted so change your src/pages/home/home.html to:
|
1 2 3 4 5 6 7 8 9 10 11 |
<ion-header> <ion-navbar> <ion-title> Ionic Themeable </ion-title> </ion-navbar> </ion-header> <ion-content padding> <button ion-button full (click)="openBrowser()">Open Browser</button> </ion-content> |
Now the actual fun begins!
To style our new browser window we can create a (quite big) ThemeableBrowserOptions object which holds all the custom styling we want to apply.
There are really a lot of options here, we just picked a few basic ones to change the color of our toolbar, the title and custom images for buttons.
Here you could also modify the behaviour of the new browser, add a custom menu and add all kinds of custom buttons to perform specific actions.
This of course completely depends on what you want to build, for example a PDF or file viewer needs different buttons than a regular browser with just a more consistent UI feeling.
You can put your images directly into the native folders of Android and iOS or like in our case, simply load them from the www/ folder of your app!
Once your options are ready you can open the browser with a website or your document and pass in the options.
Finally, you can subscribe to all the previously defined events of your buttons. In our case we subscribe to the closePressed event to simply close the browser again!
Now go ahead and change your src/pages/home/home.ts to:
|
1 2 3 4 5 6 7 8 9 10 11 12 13 14 15 16 17 18 19 20 21 22 23 24 25 26 27 28 29 30 31 32 33 34 35 36 37 38 39 40 41 42 43 44 45 46 47 48 49 50 51 |
import { Component } from '@angular/core'; import { NavController } from 'ionic-angular'; import { ThemeableBrowser, ThemeableBrowserOptions, ThemeableBrowserObject } from '@ionic-native/themeable-browser'; @Component({ selector: 'page-home', templateUrl: 'home.html' }) export class HomePage { constructor(public navCtrl: NavController, private themeableBrowser: ThemeableBrowser) { } openBrowser() { // https://ionicframework.com/docs/native/themeable-browser/ const options: ThemeableBrowserOptions = { toolbar: { height: 44, color: '#3573bbff' }, title: { color: '#ffffffff', showPageTitle: true, staticText: 'Academy Browser' }, backButton: { wwwImage: 'assets/img/back.png', align: 'left', event: 'backPressed' }, forwardButton: { wwwImage: 'assets/img/forward.png', align: 'left', event: 'forwardPressed' }, closeButton: { wwwImage: 'assets/img/close.png', align: 'left', event: 'closePressed' }, }; const browser: ThemeableBrowserObject = this.themeableBrowser.create('https://ionicacademy.com', '_blank', options); browser.on('closePressed').subscribe(data => { browser.close(); }) } } |
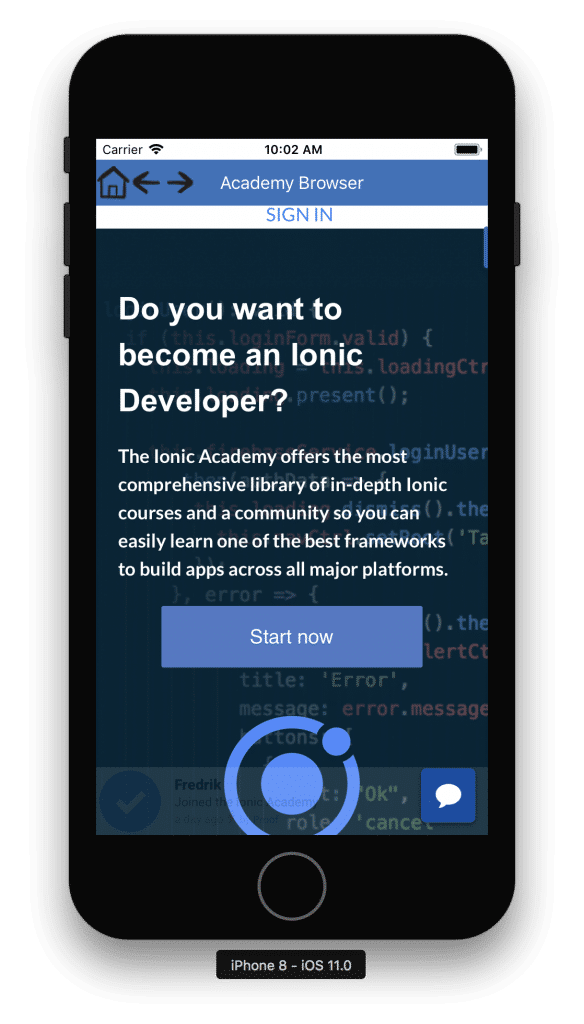
If you run your app on a device now and open the browser, you will see that we got our custom buttons inside the coloured toolbar like in the simulator image below!
It’s really not that hard to create your own browser styling, and the result is an app that never feels like your users a re leaving it although they are in a browser!
You can also find a video version of this Quick Win below!


How to hide the top section of ios (statusbar) and toolbar is overlapping the top section of website
I used this tutorial but back button image not showing in inapp browser.Please help me
The button is not working , when i click the button that will open the browser nothings work.. how to fix this ?
please, how can i open the site with themeablebrowser into home page like iframe? not new window. because when the user make back he return to the home page , and i don’t want that
This makes sense, however, like all tutorials and comments, the icons are not showing up. Any thoughts?
Image works for me.
Are you sur that the image exists for back button for example ” wwwImage: ‘assets/img/back.png”
Since my original post, I did some updates, and as it turns out, the images don’t scale well, so they can’t be a 128x128px for example. Once I made the images smaller, (maybe 30×30 – I can’t remember exactly) I got the icons to show up.